
Next.js is a React framework to create isomorphic applications. In this article we learn how to
- Create a Next.js application
- Setup AWS to host our Next.js application
- Use Serverless package to host our application to Lambda
Create Next.js Application
In order to spin up a Next.js application in our machine, we first need to install Node.js. You can test if Node.js is installed in your machine by typing following command:
node -vIt should return the version number of installed Node like v14.15.0. If it is not installed, go and install Node.js first. Once Node.js is ready, navigate to a folder where you want Next.js app to be setup. Then run following command:
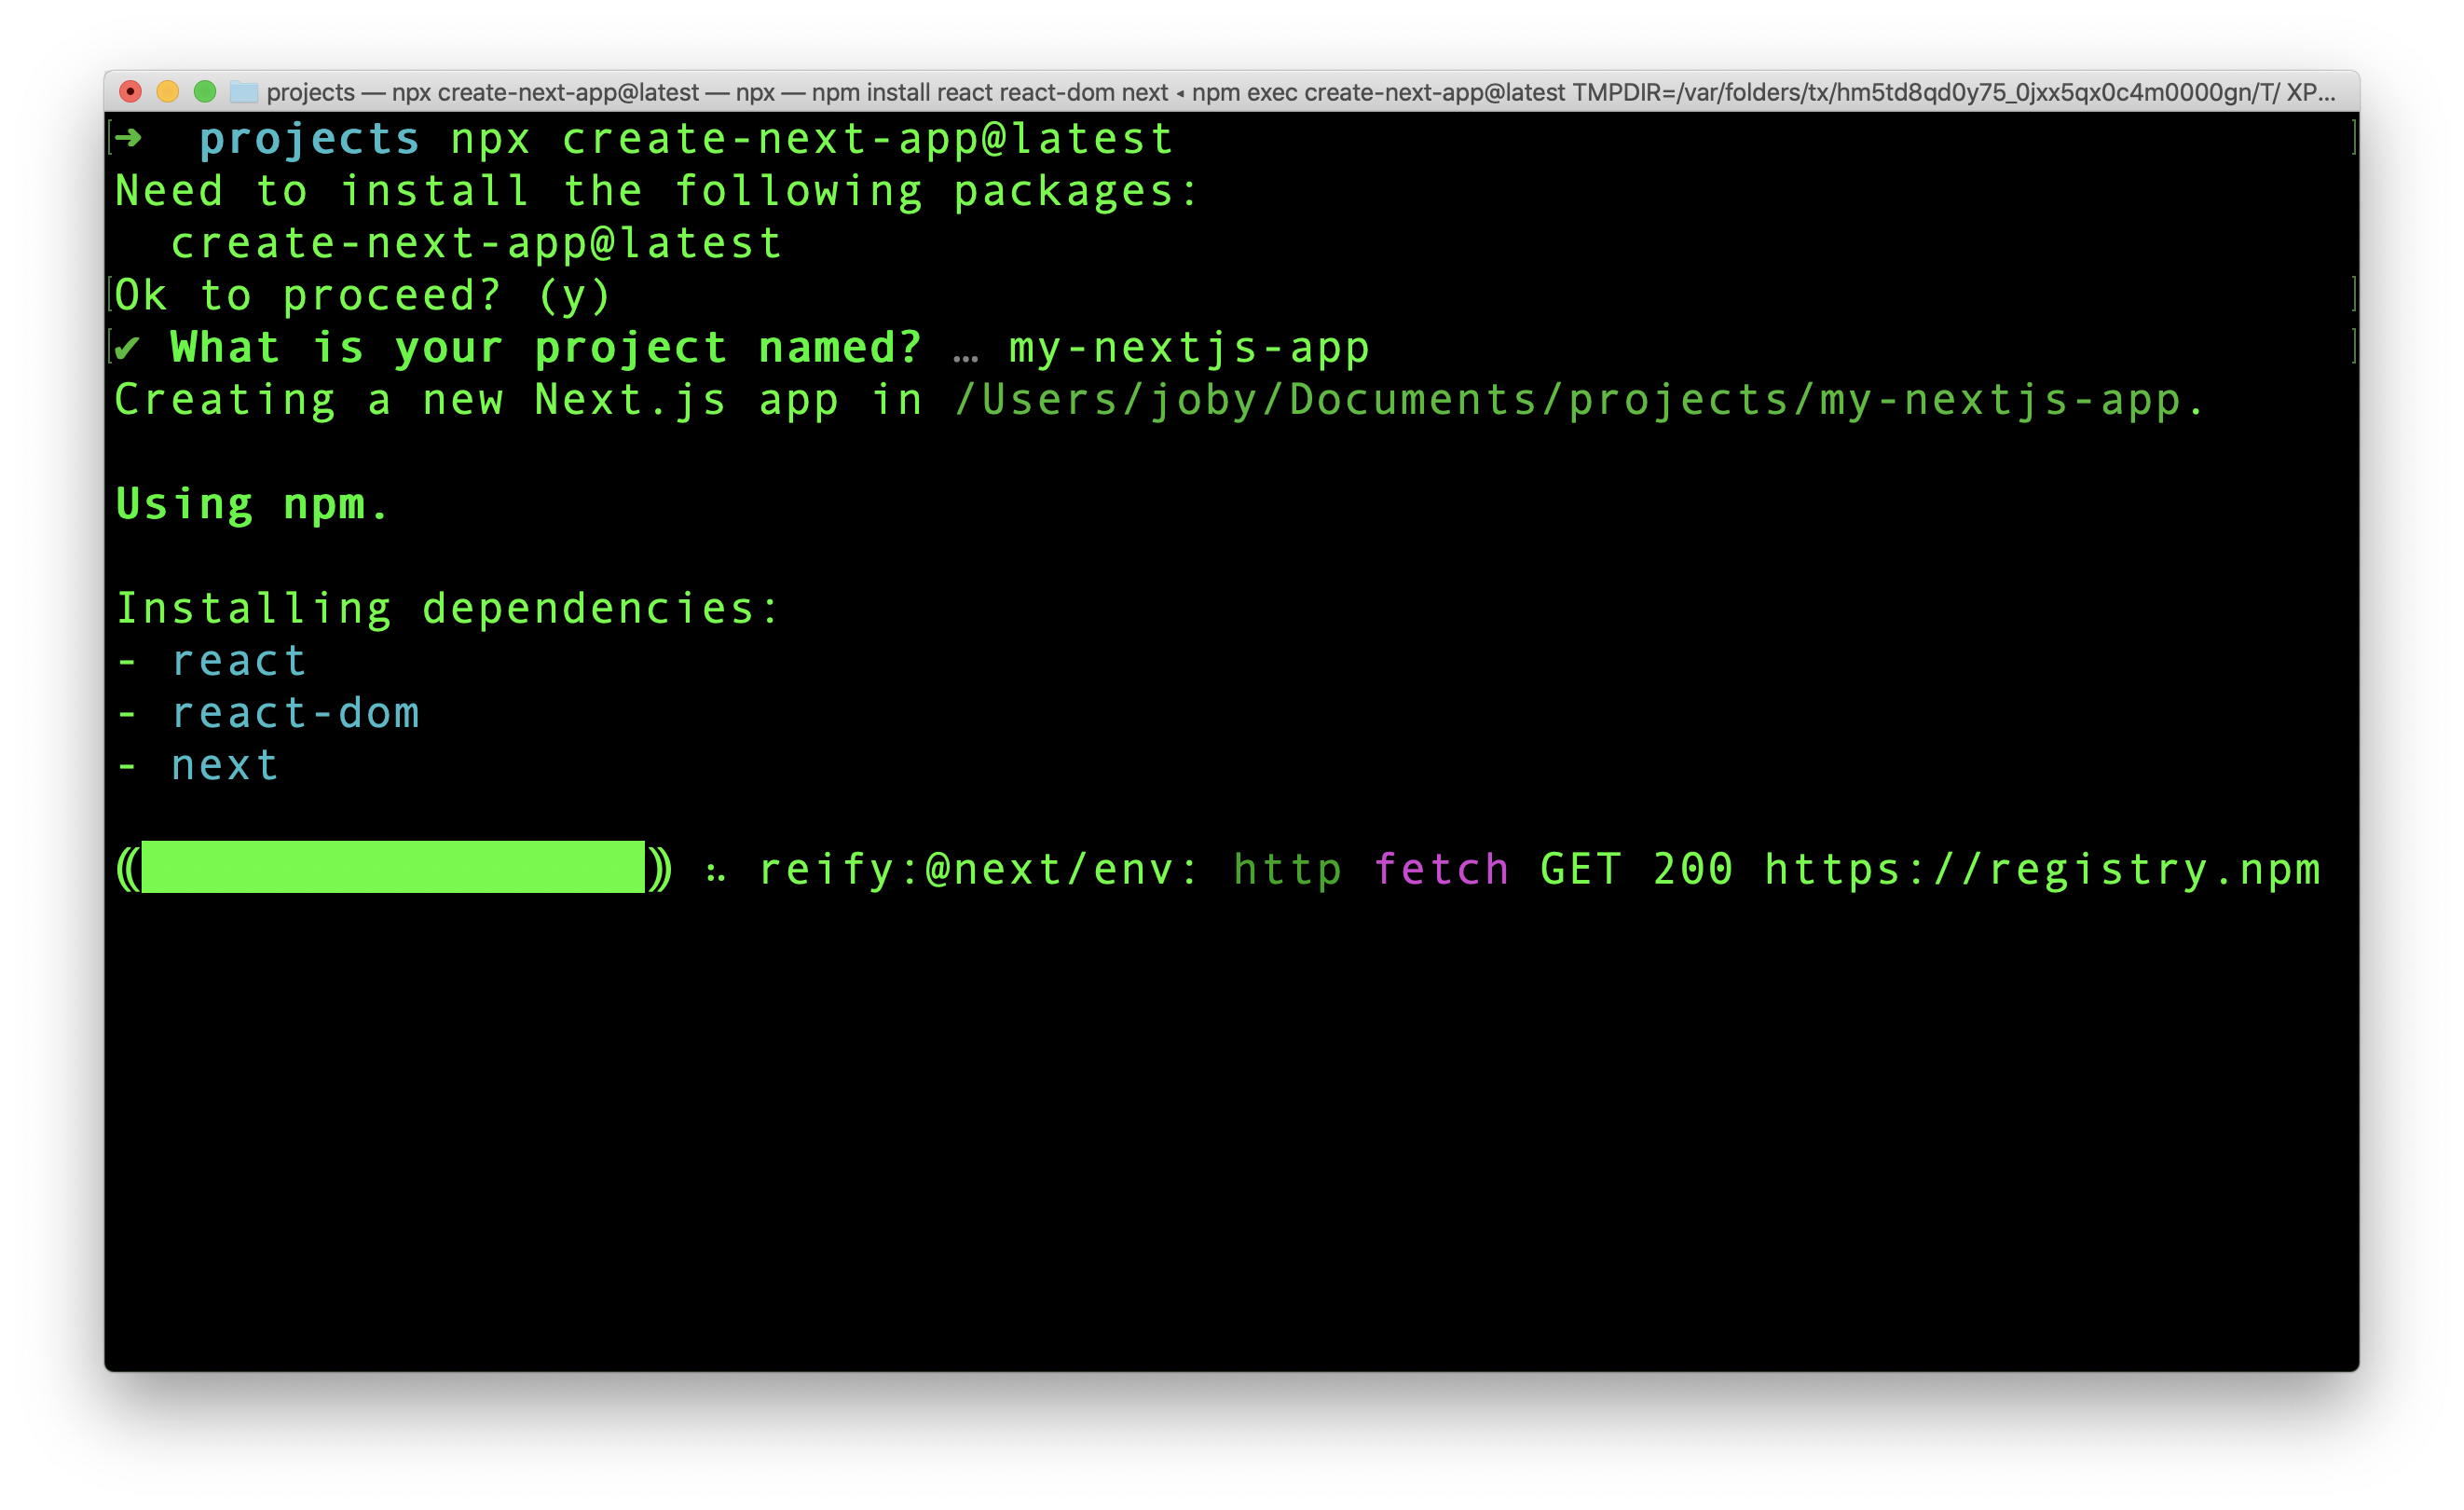
npx create-next-app@latestWhen running above command, it will ask for the project name. A folder will be then created with this name and all the files are put inside that folder. My app's name is my-nextjs-app.
Now Next.js app is ready. We can go into the app folder and run yarn dev to see the running site.
AWS Setup
We need to create an AWS user that has necessary privileges to host the application in AWS Lambda. For that, we need to create an IAM user. This step is like any other IAM user creation. Nothing special. So if you dont know how to create an IAM user, check this link.
I am listing out some details which I gave while creating my IAM user. My user id is serverless. I gave AdministratorAccess policy to this user. Now this user has all the power to do whatever it wants in AWS.
In the last step of user creation, we get an access ID and secret key for serverless user. Save it safely somewhere.
Now we have a user who is ready to take our Next.js code and host it in Lambda. Next, we need to install AWS-CLI(Command Line Interface) in our laptop and configure it. Then only any tool in the future, if it wants to do something in AWS using serverless user, it can make use of aws-cli commands to perform the same.
AWS CLI
Best way to install AWS CLI is to follow the official documentation. It lists out OS specific documentation to setup AWS-CLI. Please complete it.
Once AWS CLI is installed, you can check if it is installed correctly by running following command:
aws --versionIt should return something like this:
aws-cli/2.2.31 Python/3.8.8 Darwin/19.6.0 exe/x86_64 prompt/offAfter AWS-CLI installation, you need to configure it by following this link. During the configuration step, you provide the user credentials like access ID and secret. The AWS-CLI then remembers it and uses it for future transactions.
The AWS configure command looks like this:
$ aws configure
AWS Access Key ID [None]: AKIAIOSFODNN7EXAMPLE
AWS Secret Access Key [None]: wJalrXUtnFEMI/K7MDENG/bPxRfiCYEXAMPLEKEY
Default region name [None]: us-west-2
Default output format [None]: json
During configuration process, AWS is storing the credentials in ~/.aws/credentials file in plain text. We can view the output and see our credentials.

In the credentials file, we can see [default]. That is the profile name. We can add more profiles like that. Later, when we execute Serverless framework, we can tell which profile to use.
In the next section, we are going to use a package called serverless that makes use of the aws credentials and host our Next.js app in AWS Lambda.
Serverless in Action
Serverless framework make development, deployment and running serverless application very easy. The framework contains code that can push our application to most of the serverless solutions out there like AWS, Google cloud and Azure. In this demo, we are going to use AWS.
Serverless is a general framework that helps to host any applications to any serverless solutions. In order to host a Next.js application, there is a serverless component particularly created for Next.js. It is open source and known as Serverless Next.js Component.
We are going to use Serverless Next.js Component.
serverless.yml
In order to use Serverless framework, we need to have a serverless.yml in the root folder of the project. It is going to have all the configurations. Create this file in our Next.js root folder, ie in the same level as of parent package.json file.
In the yml file, add the following content:
myNextApplication:
  component: "@sls-next/serverless-component@latest"
Deploy Script
In package.json file, add one more command for deploy:
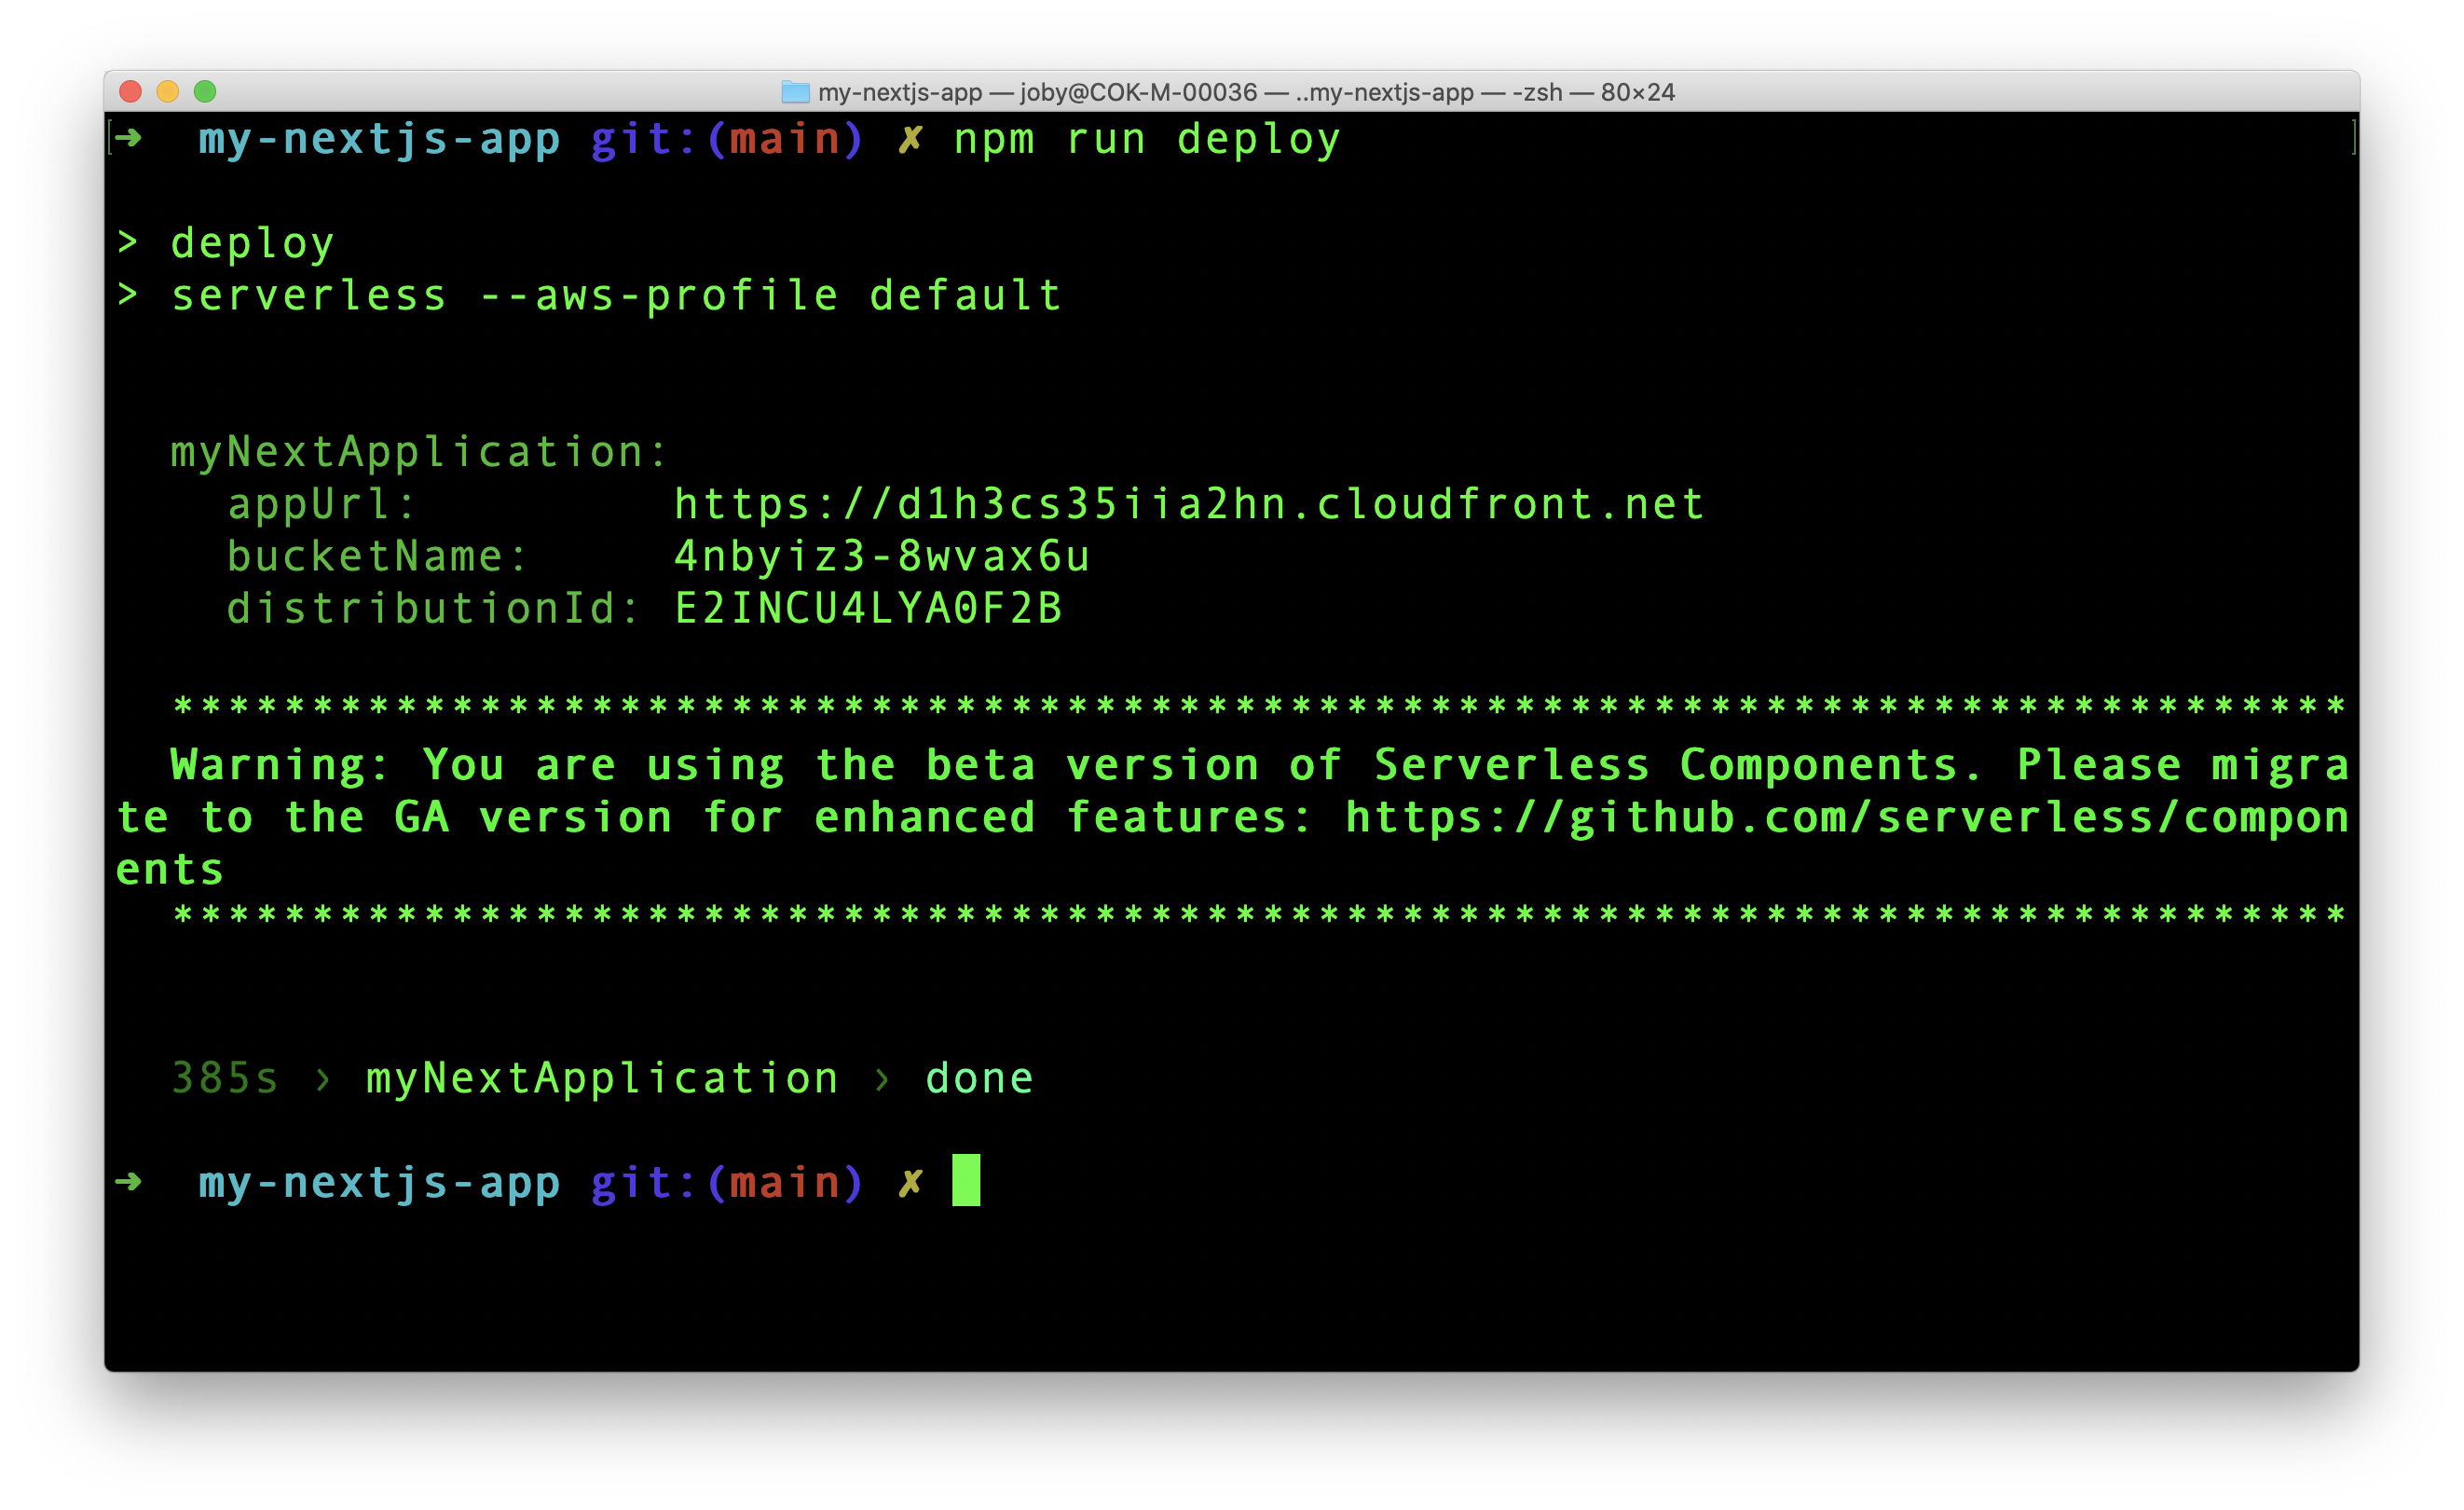
"deploy": "serverless --aws-profile default"Now when we run npm run deploy, serverless framework starts running. The framework uses the credentials of AWS default profile.
We now have all the main ingredients ready. Let us go to terminal and run below command from our app root folder.
npm run deployThis command now runs Serverless and do all steps and configure our application in AWS. The Serverless Next.js Component finally shows the cloudfront URL in the console along with other details.
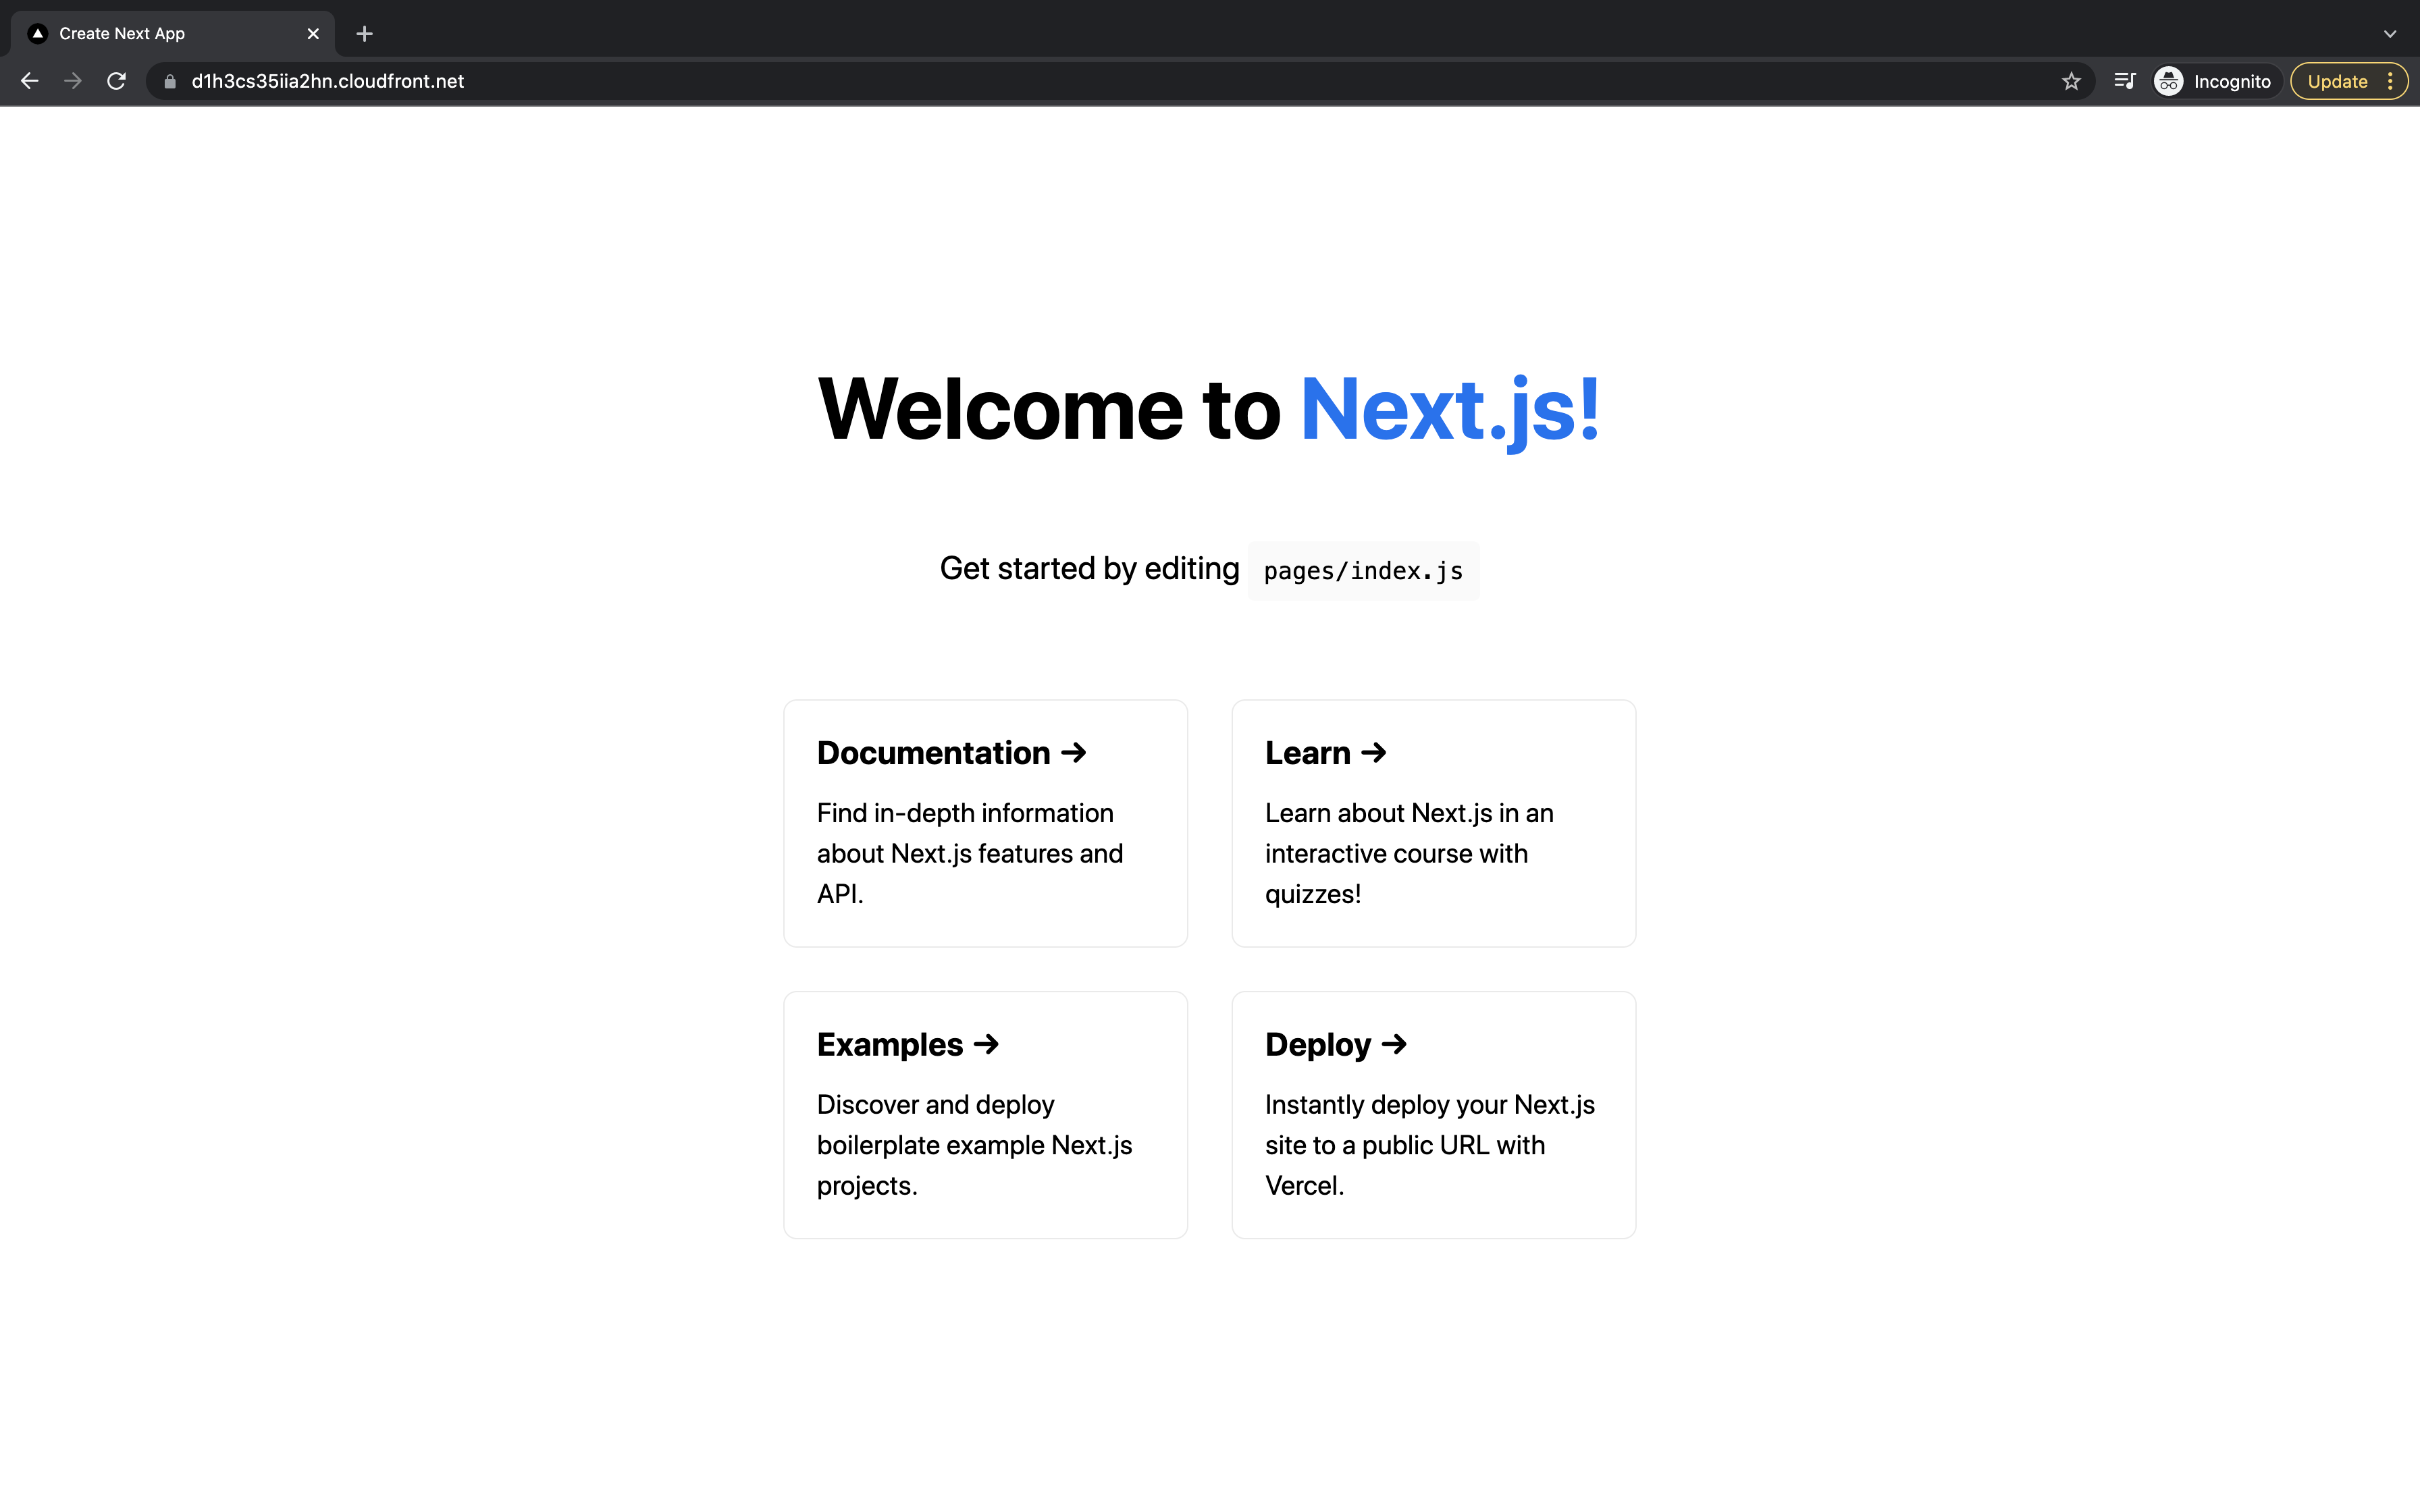
If we take the cloudfront url, https://d1h3cs35iia2hn.cloudfront.net in browser, we can see the deployed Next.js application.
Technical Summary
Next.js application requires server side rendering of React. Here, Serverless Next.js Component is deploying our app to Lambda@Edge which has the capability to execute Lambda code at CDN edges.
Serverless.yml is converted to a valid Cloud Formation file by Serverless. The entire deployment process is then conducted based on the steps provided by this Cloud Formation file.
Once Next.js app is built, we get some chunk of Javascript files and other files. These files are stored in a S3 bucket by the Serverless and the bucket id is displayed in the console(in the screenshot above) after deployment.

 Joby Joseph