
Google Chrome extension is a piece of code that adds the capabilities of Google Chrome browser. Some of the popular examples of Google Chrome extensions are:
- Wappalyzer: Finds out the libraries and frameworks used in a website
- Awesome Screenshot: Take and share webpage screenshots
- WhatFont: Easily identify the fonts used in a website
- Cookie Editor: Edit web page cookies easily, especially for testing purpose
- JSONVue: Automatically formats JSON response
Skills Required
Chrome extension is created using the same technologies for web development. Therefore, we need to have basic knowledge on:
- HTML
- CSS
- JavaScript
Inches to Centimeters Extension
It is always fun to learn a particular technology as part of a project. So, we are going to create a Google Chrome extension that helps users to convert inches to centimeters easily. By the time we complete this project, we will learn:
- Setting up folder structure
- Create
manifest.jsonfile - Set extension icon
- Design and style popup using HTML and CSS
- Manifest icons
- Bring some logic using JavaScript
- Loading the extension in Chrome browser
- Debugging using
console.log() - Reloading the extension after an update
- View errors thrown by the extension
Here is the link to completed project in Github. At any time you can compare the code to verify or download the assets as you wish.
Setup Folder Structure
In order to start developing a Chrome extension, we first need to create a folder to store all the extension files. The folder can be created anywhere in our machine. My folder name is inches-to-centimeters.
manifest.json
manifest.json file is mandatory in all extensions. When an extension is loaded to Google Chrome, Chrome looks for this file. If manifest.json file is not there in the extension folder, Chrome does not consider the folder as an extension.
Create a manifest.json file directly inside your newly created extension folder. I created mine at inches-to-centimeters/manifest.json. Then copy the below contents to the file.
{
  "manifest_version": 3,
  "name": "Inches to CM",
  "description": "Converts length in inches to centimeters",
  "version": "1.0.0",
  "action": {
    "default_popup": "popup/popup.html",
    "default_icon": "logo.png"
  }
}
The properties used in manifest.json are defined by Google. Each property has got a special meaning.
manifest_versionis set as3. This version refers to the version of manifest file to be considered while parsing. The properties and values used in version 2 is different from that of version 3.namerefers to the name of the extension. This name is used by Chrome in extensions page, web store and other places.descriptionproperty takes a basic description of the extension.versionrefers to the version of the extension itself. If we add any features or fix any issues, we update the version number. It will then be updated across all the users.actioncontains an object. The value ofdefault_popupis a path to an HTML file. This file is rendered as the extension popup. Also,default_iconholds the image that represents the extension in Chrome browser.
We will be adding one more property icons, in the manifest.json later in this article. It specifies the icons used by Chrome extensions page and Google web store.
Extension Icon
Every extension we install comes with an icon. We can see the list of icons on top of Google Chrome browser.
We are going to set an icon for our extension also. We already specified in manifest.json that our default_icon is logo.png. Therefore, we need to save our icon image as logo.png in the project root folder.
Our extension logo looks like this:

You can download the logo image from this link. Just save it in your project root folder. That is it.
Design and Style Popup
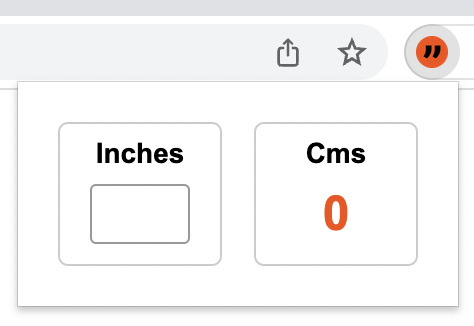
We can see all extensions showing some content when we click on the extension icon. In our case, this is how the popup looks like:
This popup design is coming from popup/popup.html which we mentioned earlier inside manifest.json file. For that matter, create a popup.html under popup folder. Paste the below HTML code into it:
<!DOCTYPE html>
<html lang="en">
  <head>
    <meta charset="UTF-8" />
    <link href="popup.css" rel="stylesheet" />
    <title>Popup</title>
  </head>
  <body>
    <div class="form-container">
      <div>
        <div class="title">Inches</div>
        <input type="text" id="inches-input" maxlength="2" />
      </div>
      <div>
        <div class="title">Cms</div>
        <div id="result">0</div>
      </div>
    </div>
  </body>
</html>
The HTML code contains mainly a form container that holds a textbox to accept inches and a result section that shows the output in centimeters.
In line number 5, we are adding reference to a css file. So, next step is to create this popup.css file under popup folder. The HTML and CSS file are in the same level. Then paste below styles to popup.css file.
html,
body {
  margin: 0;
  padding: 0;
}

.form-container {
  display: flex;
  font-family: Arial, Helvetica, sans-serif;
  font-size: 14px;
  width: 180px;
  justify-content: space-between;
  padding: 20px;
}

.form-container > div {
  border: 1px solid #ccc;
  border-radius: 5px;
  flex: 0 0 80px;
  text-align: center;
}

.title {
  font-weight: bold;
  line-height: 30px;
}

#inches-input {
  width: 50px;
  height: 30px;
  text-align: center;
  border: 1px solid #999;
  border-radius: 3px;
  box-sizing: border-box;
  padding: 10px;
  margin: 0px auto 10px auto;
  font-size: 16px;
  font-weight: bold;
  outline: none;
}

#result {
  line-height: 30px;
  font-size: 24px;
  font-weight: bold;
  color: #f84c03;
}
Loading Extension to Chrome
Now that we have built a nice popup. We would like to see it working. Normally, we install extensions from Google web store. But our extension has not reached the web store. It is still in our machine.
We can load locally stored extensions in Chrome. For that first, visit chrome://extensions in Chrome browser.

Click on the Load unpacked button. Select the inches-to-centimeters folder. If you have given another name, select that folder.
We can see our extension loaded, just like any other extensions.
Manifest Icons
Right now, when we go to the extensions page, we can see our extension there. But, there is no icon for the extension.
In order to bring the extension icon here, we need to add icons property in manifest.json file. For that open manifest.json file and add below properties.
"icons": {
    "16": "icons/icon16.png",
    "32": "icons/icon32.png",
    "48": "icons/icon48.png",
    "128": "icons/icon128.png"
  },
Above key-value pairs tell Chrome, where to look for icons of different size. We now need to create an icons folder and place 4 icons in it. You can download the icons from below links:
After placing the icons, if we reload the extension, we can see the icon in the tile.
Adding Logic Using JavaScript
Just like any web page, we can add JavaScript to popup.html. For that, first create popup.js under popup folder. Add the script reference just before closing <body> tag inside popup.html.
<!DOCTYPE html>
<html lang="en">
    <!-- ... -->
    <script src="popup.js"></script>  </body>
</html>
Copy the below contents to popup.js.
const inInput = document.getElementById("inches-input");
inInput.addEventListener("keyup", (e) => {
  const inches = parseFloat(e.target.value);
  if (isNaN(inches)) {
    document.getElementById("result").innerHTML = 0;
  } else {
    document.getElementById("result").innerHTML = inches * 2.54;
  }
});
Above scripts will take the value of textbox as we type and writes the centimeter value in the result section.
Reload Updated Extension
Now that we updated the extension code. We added JavaScript also to our extension. The already loaded extension in Google Chrome, will not automatically update to reflect the code change. We need to manually do the update.
For that, Go to the extension tile in chrome://extensions page.

Click on the refresh icon in the tile. That will reload the extension with updated code.
Debugging Using Console Logs
In JavaScript, we can log messages using console.log(). We can make use of the same method to print messages in console.
Always keep in mind that extensions run in a separate context than the current web page.
Let us add a console.log() in popup.js. Add below line on the top of popup.js.
console.log("I am loaded from extension");Save the file and reload the extension.
In order to see the logged message, we need to right click on top of the extension popup and then view the console.
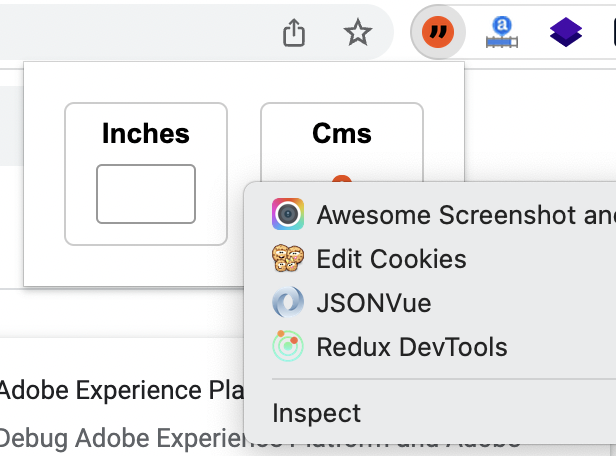
A new window will popup. There we can see the message logged.
Viewing Errors
In order to view error, let us make an error in popup.js. We are going to use a variable color which is not declared. That will throw a reference error.
console.log(color);Add above line as the last line of popup.js; Now reload the extension. We can see a new button called Errors in the extesion tile.
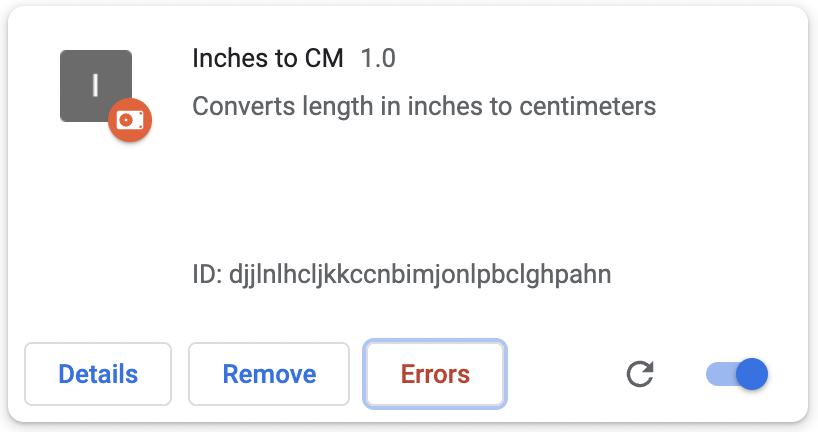
If we click on the button, we can see the details of the error.
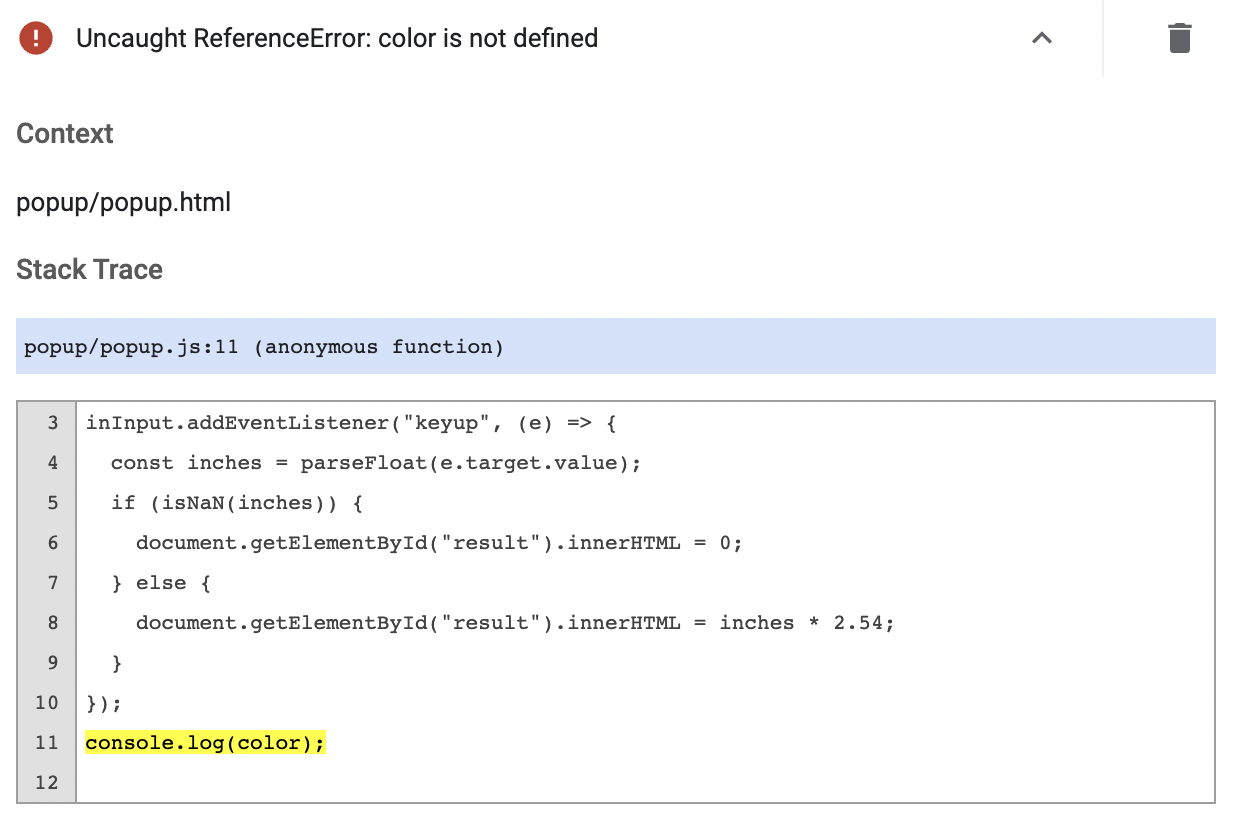
The line that throws the error is highlighted in yellow.
Summary
We learned how to setup a basic extension, style it and add some logic using JavaScript. We also learned how to debug using console.log() and extension error window.

 Joby Joseph